
DIY Dollar Store Painted Pot Tutorial: A Simple Way to Brighten Any Space
DIY Dollar Store Painted Pot Tutorial: A Simple Way to Brighten Any Space
Affiliate Disclosure:
This post contains affiliate links. As an Amazon Associate, I may earn a small commission from qualifying purchases—at no additional cost to you. I only share products I genuinely love and personally use.
The $1.50 Makeover That Surprised Me
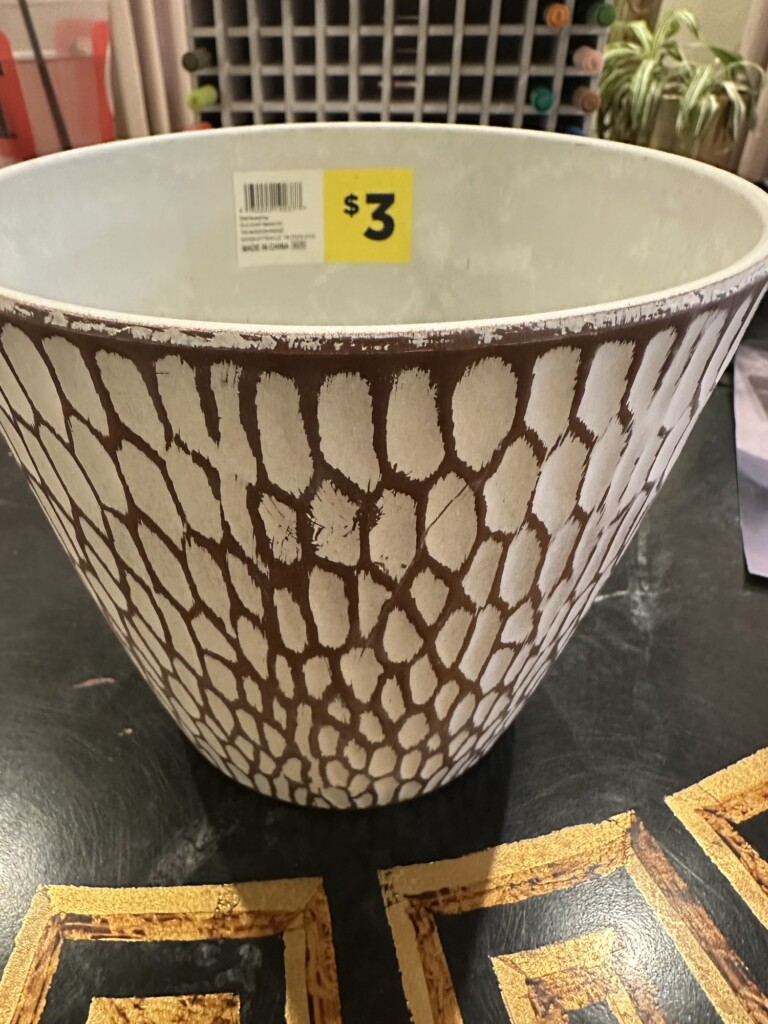
Sometimes creativity sneaks up on you in the middle of a grocery run. I spotted this little pot at Dollar General—half off its $3 price tag—and instantly saw potential.
Armed with a few acrylic paint pens, I turned that simple pot into a colorful accent piece that now brightens up my windowsill. The entire project cost less than a latte and took under an hour.

Supplies You’ll Need:
Here’s what I used to make this budget-friendly planter pop:
Acrylic Dual Tip Paint Markers (Set of 48) —
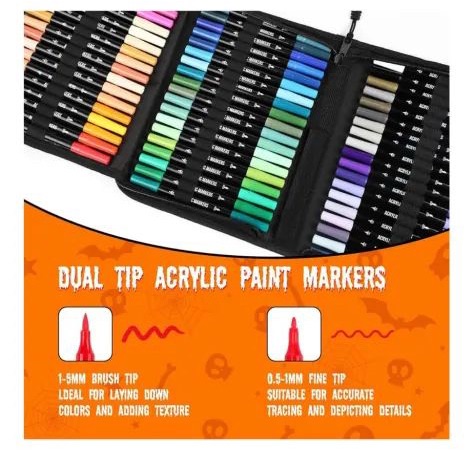
Beautiful color flow and excellent customer service—this brand actually replaced a low-rated set for a buyer, earning them a five-star update!
Inexpensive Pot- Mine was half of $3 from Dollar General
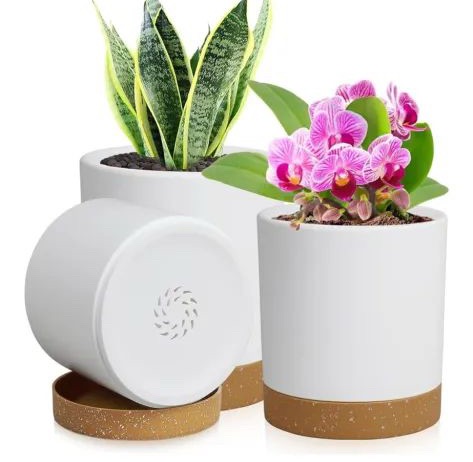
Set of 16 Mini Pots — Amazon link
Retro Design Pot Set — Amazon link
Neutral Modern Pot Set — Amazon link
Optional:
Fine-grit sandpaper for better paint adhesion Painter’s tape for clean lines Clear acrylic sealer or varnish spray for outdoor durability.
Step-by-Step
1. OPTIONAL Prep
Wash your pot and let it dry completely. If it’s glossy, lightly sand the surface to give the paint something to grip.
2. OPTIONAL Outline
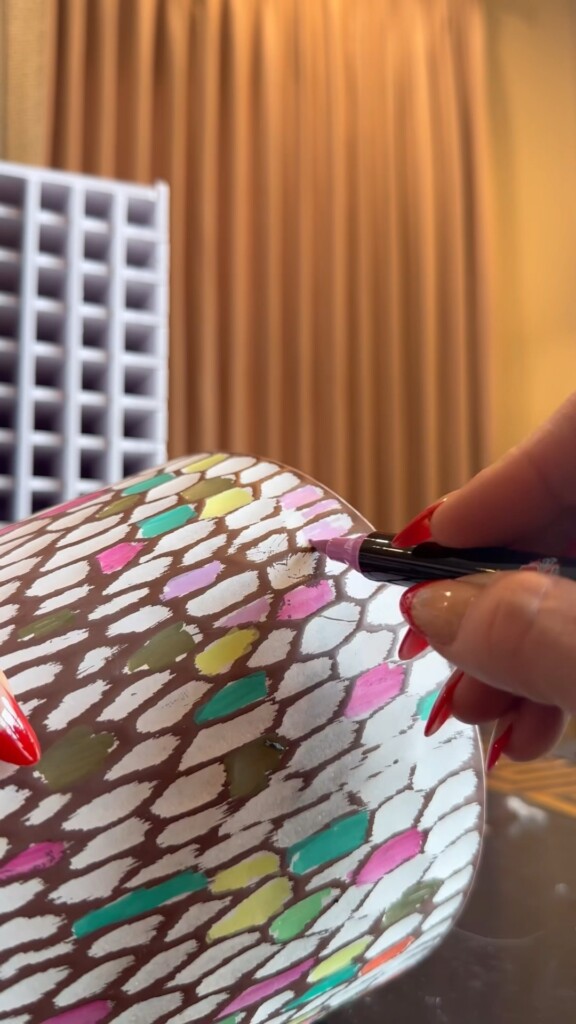
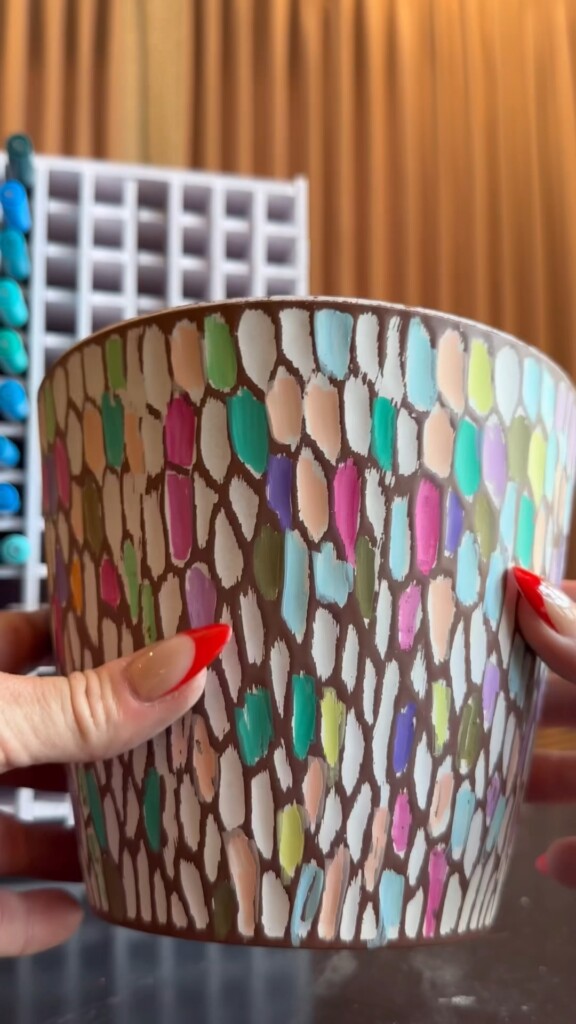
Start with a neutral base—mine was a warm chocolate brown. Once it’s dry, sketch an irregular pattern (think mosaic or pebble shapes). The organic lines keep it playful.
3. Paint
Use your paint pens to fill in random shapes with color. Try pastels, jewel tones, or a cohesive palette that matches your décor. Vary your strokes—short and wide—for a painterly texture.
4. Dry
Let it dry for 30–60 minutes. The colors will settle into a soft matte finish.
5. OPTIONAL Seal
If you’ll be using your planter outdoors, finish with a clear acrylic sealer to protect your artwork.
Styling Tips
Arrange three painted pots together for a colorful vignette. Mix and match with thrifted planters for an eclectic look. Wrap the rim in jute or twine for texture. Use them as desk organizers, kitchen herb pots, or gifts.
Share Your Creations
Please share this project with me or any other pot painting project!
Creativity makes the world go around.
Did this post inspire you? If you’ve painted or repurposed inexpensive or thrift store planters, share your photos and tag me — I will try and feature your project in an upcoming post. Your creations matter and can inspire others.
Don’t forget to subscribe to The Mood Room for more MOOD=Creative Projects which include DIY tutorials, art projects, and creative inspiration. Art straight to your inbox.
Final Thoughts
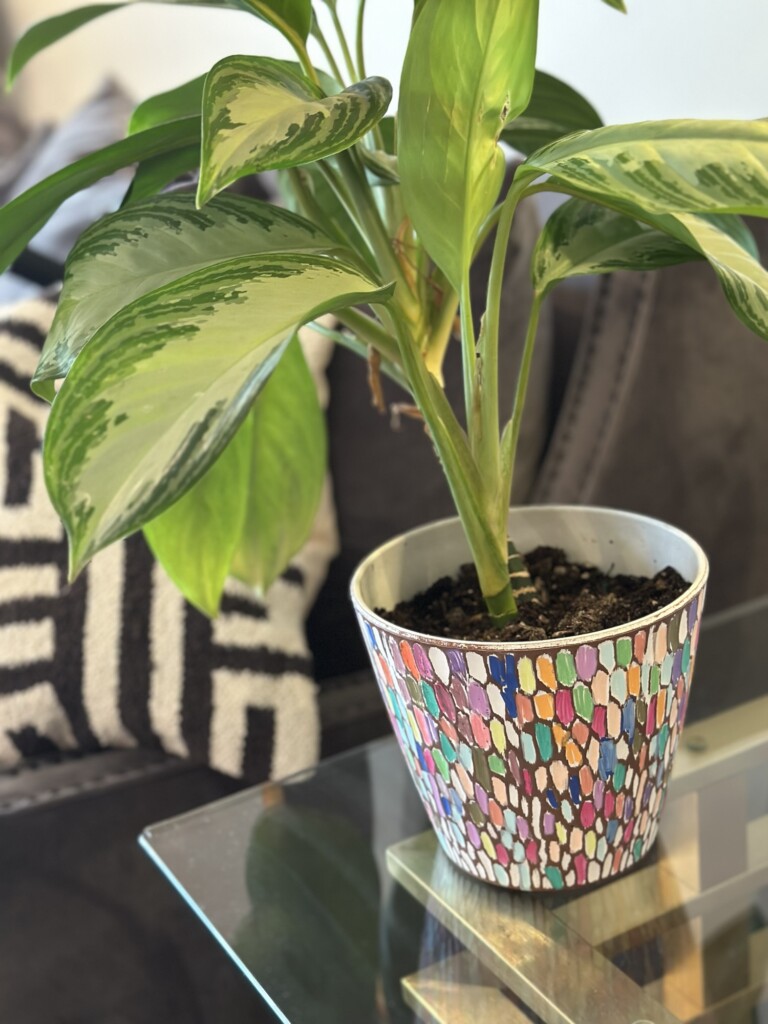
This project reminded me that a successful project doesn’t need a big budget or hours of your day… unless you want it to—it just needs imagination and a few good supplies.
A $1.50 pot, some color, and a little time can spark a whole mood.
Happy creating
MOOD=Craft Desires Fulfilled


Be the first to comment